Beyond Basics: The Best Sewing Hacks for Pros
Nov 04, 2024
The more experienced you become as a dressmaker, there’s something that we all come to understand; there’s always room for improvement in the sewing room, even if you’ve mastered the basics. I’m going to take you through some advanced sewing techniques and tools that can make a big difference.
1. The importance of a tailor’s ham and seam roll
Here’s an old saying “What’s the difference between hand made and professionally made? The pressing!” Investing in a tailor’s ham and seam roll allows you to press curved areas, like darts and princess seams, without flattening the fabric. This is essential for garments that follow the natural contours of the body, like dresses and fitted tops.
Pro Tip: Use a pressing cloth to prevent your iron from damaging the fabric or the iron getting damaged from melting or scratchy fabrics.
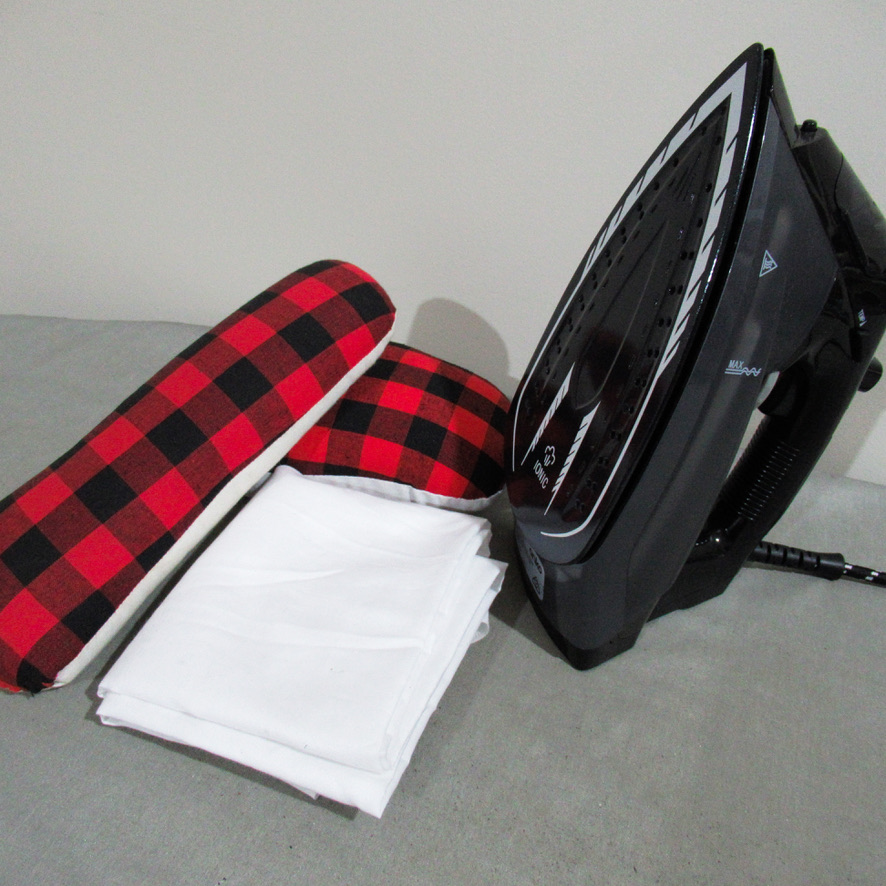
2. Use soft cotton or a cotton/linen blend fabric as a pressing cloth
Plain cotton or a cotton/linen blend fabric is one of the best pressing cloths for delicate or tricky fabrics. Many people would suggest a silk fabric for a pressing cloth but they tend to not last long with the steam and water that needs to be used for many fabrics.
Pro Tip: Keep a few pieces of fabric in different sizes around your workspace so you always have the right one for the job. I have one that is a 50cm square and another that is a smaller piece for smaller and tricky areas to iron.
3. Topstitching with a double needle
When topstitching, using a double needle can create a beautiful finish plus adding durability to your seams. Double needles work well for hems on knit fabrics and add a polished finish to areas like waistbands and cuffs. It can also be used to secure a raw seam allowance on the inside of a garment without adding more thread to your seams.
Pro Tip: Practice on a scrap fabric first to adjust your stitch length and tension, ensuring clean lines without puckering.
4. Basting tape for perfect zippers
Inserting a zipper perfectly can be one of the trickiest aspects of dressmaking, even for experienced sewists. Basting tape can make all the difference by temporarily holding the zipper in place, allowing you to sew smoothly and precisely. It’s especially helpful with invisible zippers, where alignment is crucial. It also holds stretchy fabric stable to prevent it from creating a wavy zipper.
Pro Tip: A basting tape can also be called two sided or double sided interfacing. Use this for a permanently reinforced edge.
5. Stay stitch curved edges to prevent stretching
Curved edges like necklines and armseyes can easily stretch out of shape, especially in delicate and stretchy fabrics. Stay stitching is sewing a line of stitching just inside the seam allowance.
Pro Tip: Avoid stretching the fabric while stitching. You can also use a thin line of interfacing to prevent the fabric from stretching while stitching the stay stitch.
6. Use a walking foot for difficult fabrics
If you’re working with tricky fabrics like knits, leather, or even velvet, a walking foot is your best friend. It ensures that multiple layers move through the machine evenly, reducing puckering and preventing one layer from shifting more than the other.
Pro Tip: Test the walking foot on scrap fabric first, as it can sometimes alter stitch length. Experiment until you find the perfect settings for each project.
7. Invisible hems with blind hem stitch
A professional-looking hem is often invisible to the naked eye. Many sewing machines come with a blind hem foot that allows you to create an invisible hem with ease. This is particularly helpful for formal wear or when working with lightweight fabrics.
Pro Tip: Practice adjusting your stitch width and length on scrap fabric to get the stitch just right – it should be barely visible on the front. It takes a while to get the hang of this one so make sure you check out the Intro to Dressmaking: Basic Sewing Techniques for a full tutorial.

8. The magic of interfacing - choosing the right one
Interfacing can be the difference between a professional garment and a limp, shapeless one. Fusible interfacing is excellent for most fabrics, but non-fusible interfacing can be ideal for fabrics that can’t withstand heat. Lightweight interfacing adds structure to delicate fabrics, while medium- to heavyweight interfacing is great for collars, cuffs, and waistbands.
Pro Tip: Always test a small swatch to ensure the interfacing doesn’t change the drape of the fabric. And be mindful of the grainline on woven interfacing for the best results.
9. Underlining for superior structure
Underlining is a layer of fabric between the outer layer and the lining. It can also be called a strength layer. It’s when you attach an additional layer of fabric to your garment fabric before stitching, providing added structure and preventing the main fabric from stretching. It’s particularly useful for lightweight or sheer fabrics. Underlining also helps achieve a smooth, opaque finish.
Pro Tip: Choose a fabric for underlining that is lightweight, yet sturdy, like cotton batiste or silk organza, and hand-baste it to the garment fabric to keep the layers aligned.
10. Keep your tools sharp and clean
As basic as it sounds, keeping your cutting tools sharp is essential for precision work. Dull scissors or rotary cutters can create jagged edges, compromising the clean lines of your pattern pieces. I have a routine of doing a full clean of my sewing area and all of my tools once I’ve finished a project to make sure all of my tools are in good condition and can be used for another project.
Pro Tip: Visit a professional sharpener for all of your scissors and stock up on razor blades and hobby knives. DO NOT USE YOUR FABRIC SCISSORS FOR ANYTHING OTHER THAN FABRIC! I think we should all know that by now (I hope).
11. Using pattern weights instead of pins
For lightweight or delicate fabrics that can easily be distorted by pins, consider using pattern weights. They’re also faster to apply and remove, which speeds up your cutting time. You will need to use a sharp rotary blade to get the most precise cut and make sure you don’t distort the fabric when lifting it with your scissors.
Pro Tip: If you don’t have specific pattern weights, substitute with household items like fabric wrapped washers or heavy paperweights with a soft base.
12. Clean finishing techniques for unlined garments
Not all garments require a lining, but unlined pieces should still have clean, finished seams. Techniques like french seams, bias tape binding, and flat-felled seams give the inside of your garment a professional look. For full tutorials on how to do this, check out the Intro to Dressmaking: Basic Sewing Techniques course.
Pro Tip: Choose seam finishes based on the fabric type and garment style. French seams work well for lightweight fabrics, while bias tape is ideal for quick, clean edges.